Showing posts with label Exchange Online. Show all posts

Office 365 Mailbox Forwarding Rules Report using PowerShell

Being on top of who’s forwarding messages to who’s email, especially those being forwarded to external domains is essential to email security for administrators. Phishing attacks can leave your users’ mailboxes prone to data exfiltration by way of forwarding emails, and so being able to regularly review and audit mailbox forwarding rules is beneficial to protecting your company’s data.
This script can be used to export a report of all the forward/redirect rules present in all user mailboxes.


Download Link

https://github.com/junecastillote/Export-ExoMailForwardRules


Requirements

  • Must have an Office 365 account that is assigned at least an Exchange Administrator role whose credentials will be used to connect to Office 365 PowerShell.
    • It is important that the account is not MFA enabled as the script operates by paging and re-authenticates to Office 365 page.
  • Must have a mailbox to be able to send the email report using Office 365 SMTP Relay. This could be the Service Account you’re using for the session, or a Shared Mailbox that the Service Account has Send As permission to. If you do not plan to send the report thru email, then you can disregard this requirement.


How to use

Setup Office 365 Credentials

  • Open PowerShell and change to the directory where the script is saved (eg. C:\Scripts\Export-ExoMailForwardRules)
  • Run this command:
  • Get-Credential | Export-CliXml Office365StoredCredential.xml

  • This saves the encrypted credential in the same folder


Modify Variables

Email Settings


NOTE: The $sender value must be the actual email address of the service account or the shared mailbox used for sending the email report.
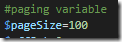
Paging

In cases where there are a large number of mailboxes to be processed, the Exchange Online PowerShell session may timeout/disconnect which would cause the script to fail. As a workaround, this script is configured to process the mailboxes in pages. By default, the page settings is set to 100 – which means after every 100 mailboxes processed, the script will re-establish and re-authenticate the PowerShell session. You can increase the page value but it is not recommended to set it too high.

Run the script

The script requires no parameters.


Output

CSV File
The csv file gets saved in the “\Reports” folder


Email

Share:

Enable Mailbox Auditing in Office 365 using PowerShell Script

One of the things that don’t happen automatically when provisioning an Office 365 Mailbox is getting the Mailbox Audit Enabled. This script can be run manually or by schedule to enable auditing on mailboxes.

Download Link

https://github.com/junecastillote/Enable-EXOMailboxAudit


Requirements

  • The Office 365 account to be used to run the script must be assigned an Exchange Administrator role in order to read and set mailbox audit settings.
  • Must have a mailbox to be able to send the email report using Office 365 SMTP Relay


Office 365 Credentials

This script uses an encrypted credential (XML). To store the credential:

  • Login to the Server/Computer using the account that will be used to run the script/task
  • Run this "Get-Credential | Export-CliXml Office365StoredCredential.xml"
  • Make sure that Office365StoredCredential.xml is in the same folder as the script.


Modify Variables

  • $sendEmail – set to $true or $false depending on whether you’d like the report to be send to email
  • $sender – This is the Sender Email Address – make sure this is the email address or the Office 365 Credential you are using for the script.
  • $recipients – These are the recipient addresses. To add multiple recipients, separate with comma.
  • $subject – This will show as the subject of the email report.


Run the script

The script requires no parameters.

Sample Report

Email

CSV

Share:

Office 365 Service Health Check [.NET]

Tool Overview

The AlertO365 Tool provides a mechanism to check the Office 365 Service Status and Events programmatically eliminating the need to logon to the Office 365 Portal manually. This tool utilize the “Office 365 Service Communications API” as provided by Microsoft.

Reference: https://msdn.microsoft.com/en-us/library/office/dn776043.aspx

The Package

Files and Folders

Name
Type
Description
AlertO365.exe
File
Main executable (no parameter required)
AlertO365.exe.config
File
Contain configuration values used by the tool (XML format)
microsoft.exchange.servicestatus.tenantcommunications.data.dll
File
Office 365 Communications API
report
Folder
First Sub-Folder
Contains the HTML reports
images
Folder
Sub-Folder of the Report Folder
Logo1.png
File
First Logo in the report
Logo2.png
File
Second Logo in the report

Install and Configure

Installation
To use this tool, no special install utility is needed. Just extract/copy the package to any location on the computer/server.

In this example, the tool is extracted and placed under the C:\ drive

Image 1. Folder Structure

Configuration

The configuration file is AlertO365.exe.config, this is in XML format and can be edited using a normal text editor like Notepad.

Image 2. AlertO365.exe.config contents


Fields and Values

ServiceURL – No need to change this. This is a constant value provided by Microsoft in their API documentation

DomainNames – The Tenant Domain to be checked (enter only one domain)

UserName – Username used to authenticate to the Tenant Domain

Password – Password for the Tenant Domain credential

IsAOBO – No need to change this. The function related to this value is not (yet) implemented.

PastDays – Number of days with which the tool would query events for (i.e 1 for the past 1 day)

SenderAddress – Sender address of the email report

RecipientAddress – Recipient addresses of the email report. Separate with comma (,) for multiple recipients

SMTPServer – IP address or resolvable name of the SMTP relay used for sending the email report

MailSubject – The String to be used as Message Subject and Report Title

Company – The company or domain name that will appear in the report

SendViaEmail – Yes or No indicates whether the HTML output will be sent via email or not.

Other Configuration Items

The package contains two images namely Logo1.png and Logo2.png. These images are located under “\report\images” folder. Upon creation of the report, these images will be embedded in the email representing the Client/Company we managed and HP. Before putting the tool in production use, make sure to replace the Logo1.png file with the appropriate logo image for the client/company being managed.


Sample Report

Image 3. Sample HTML Report via Email

How to Use

This is a console-only application which is best executed using the command shell (or can also be double-click in explorer – not recommended).


Can also be executed by Scheduled Task if preferred to run at certain interval (Daily, Hourly, Monthly..)


Image 4. Sample Tool Execution


Download and Source Code

AlertO365 1.2 - https://github.com/junecastillote/AlertO365

Note: Download contains source code. If you want to just get the binary output and associated files listed in "Files and Folders" section above, just go to the "bin/Release" folder.


Share:

Popular Posts

Powered by Blogger.

Labels