
May 30, 2019 - Updated post to show new App Registration experience.
This script demonstrates how to retrieve the Office 365 Service Health Data using the Office 365 Management API, and send the email report using Microsoft Graph API.
The logic flow is simple:
- Retrieve Office 365 Service Health Record (this is the only action done during the first run, saved to new.csv)
- Read Old Records from the file (old.csv)
- Compare retrieved records with old records (new.csv VS old.csv)
- Report if there are new or updated records (updated.csv)
What is covered by this post?
- App Registration in Azure AD
- Configuring the Script
- Running the Script and Generating Outputs / Reports
What is NOT covered by this post?
This post does not cover the “How-To” of the said APIs, because they can already be found by following these links:- Office 365 Management APIs - https://docs.microsoft.com/en-us/office/office-365-management-api/
- Microsoft Graph API - https://developer.microsoft.com/en-us/graph/docs/concepts/overview
Requirements
- Application Registration in Azure AD (Application ID + Key + Permissions)
- Exchange Online Mailbox (User or Shared Mailbox, for sending reports)
Download and Change Logs
v1.5 (latest) - https://github.com/junecastillote/Get-O365HealthReport- code cleanup
- added code to cater to the new App Registration Keys special characters
- code cleanup
- fixed JSON conversion for the email report
- added "exclusion" feature. (requested from this issue)
- the exclusions.csv file inside the \resource folder can now be used to exclude workloads from the report.
- Modified to also check the changes in "Status" to trigger an update alert. (eg. Service Degradation to Service Restored). This is because I observed that some events' Last Updated Time does not change but the Status change which is not getting captured by the previous script.
- Added “organizationName” field in config.xml
- Removed “mailSubject” field from config.xml
- Send one email per event (alerts are no longer consolidated in one single email)
- Initial build
App Registration
Note: Your account must be a Global Admin- Go to Azure Active Directory > App Registrations

- Click New Registration
- Fill out the Name, Supported account types and Redirect URI as shown below, then click Create


- Then click Register
- Once the App is registered, copy the Application ID for later use.

- Click Certificates and Secrets
- Click New client secret

- Type in the Description and select the expiration for your key, then click Add

- After clicking Add, the Key will be generated. You must copy this key value because it will not be shown again.

- Go to API permissions and make sure you add these permissions

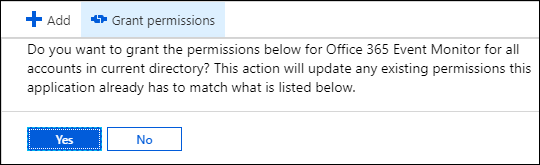
- Once Required Permissions are added, click Grant admin consent..

- Click Yes
Script Configuration
Open the config.xml file and edit the values as necessary like the example below:
sendEmail – set this to TRUE or FALSE depending on whether you want the report sent thru email.
testMode – set this to TRUE or FALSE depending on whether you want to run in test mode or not. Test Mode will treat ALL items retrieved from the service health dashboard as NEW or UPDATE. When you’re ready to put this script in production, set this to FALSE
clientID – this is the Application ID you copied from the App Registration in Azure AD
clientSecret – this is the Key you copied from the App Registration in Azure AD
tenantDomain – this is your Office 365 Tenant Domain
toAddress – your intended recipients of the report, separate multiple recipients with a comma with no spaces.
fromAddress – the primary smtp address of the Shared Mailbox or User Mailbox you want to use for sending the email report.
organizationName – the name of your organization to reflect in the alert.
How to Exclude Workloads from the Report
Note: This is applicable only from version 1.3.- Open the \resources\exclusions.csv file
- Change the Excluded value of the workload you want to exclude to 1 (0=include, 1=include)

Running the Script
IMPORTANT: In the first run, whether in Test Mode or not, will only generate the data that will be needed for future run comparisons.In this example, the script is in run Test Mode.

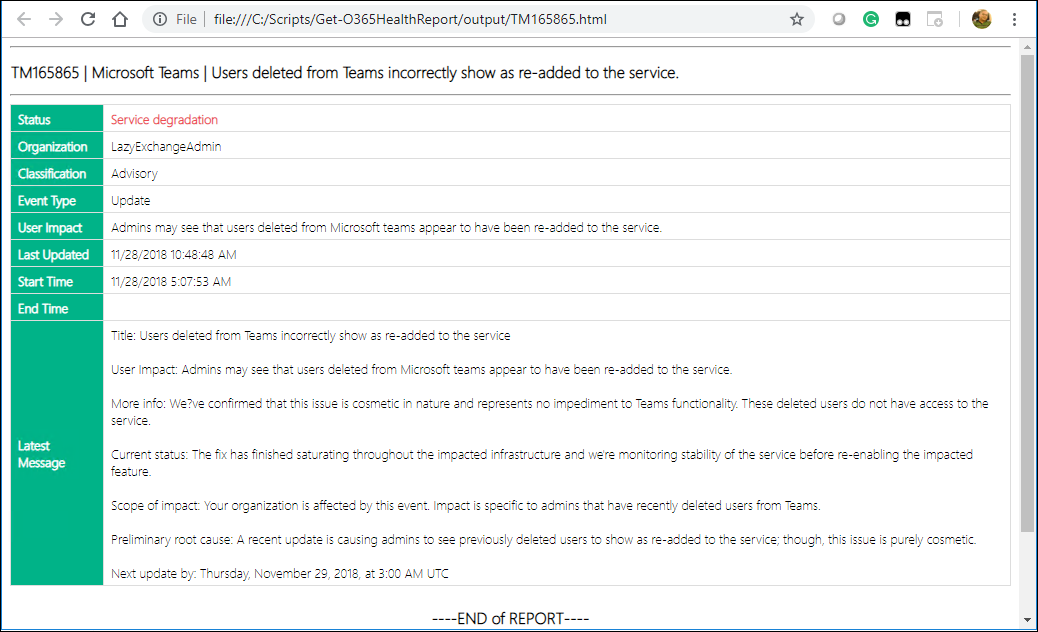
Sample Output
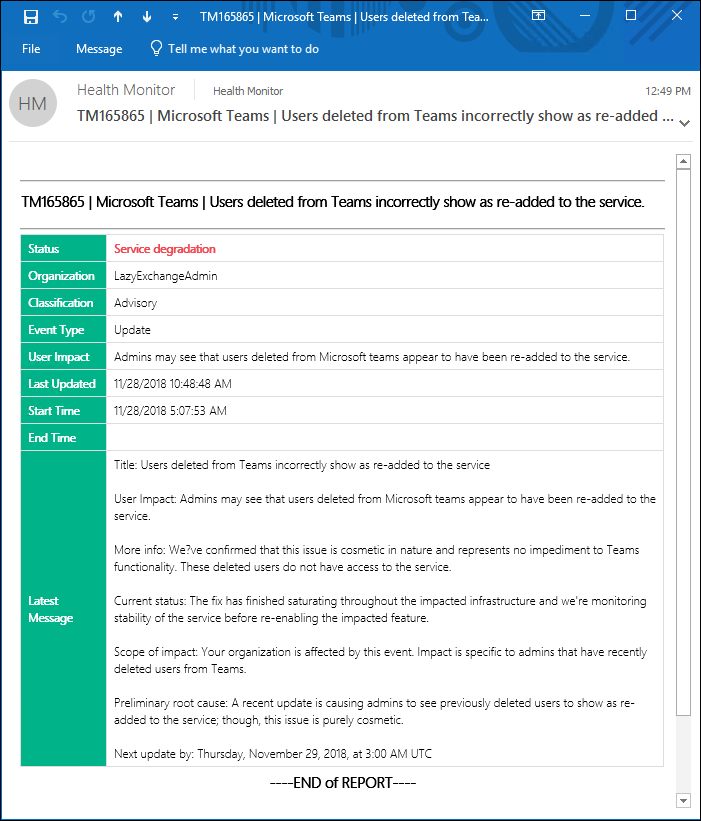
HTML

This script is functional, but I’m sure there can be many improvements. Or perhaps someone else has accomplished this differently. So please feel free to comment or modify and improve, just please don’t forget to credit the original source.


how will I let script pic proxy setting of IE:
ReplyDelete$proxyOptions = New-PSSessionOption -ProxyAccessType IEConfig
$Session = New-PSSession -ConfigurationName Microsoft.Exchange -ConnectionUri https://outlook.office365.com/powershell-liveid/ -Credential $Cred -Authentication Basic -AllowRedirection -SessionOption $proxyOptions
like the way I connect to EXO powershell ?
I would normally run this inside the powershell session first
Delete[System.Net.WebRequest]::DefaultWebProxy.Credentials = [System.Net.CredentialCache]::DefaultNetworkCredentials
If I wanted to change the Graph to BCC vs To, not knowing the Graph API piece that well yet, am I looking at changing lines 348-350?
ReplyDeleteif you're using the latest version (v1.5) -
DeleteYou can just replace "toRecipients" to "bccRecipients" in line
I am getting the below error when running the script, Please help.
ReplyDeleteThe remote server returned an error: (500) Internal Server Error.
Hi. Please test with the latest version (v1.5) first, then let me know if you still get the same problem - with complete details.
Deletev1.5 published
ReplyDeleteHi June,
ReplyDeleteI encountered this error running your script:
Sending Alert for EX180414
PS>TerminatingError(Invoke-RestMethod): "The remote server returned an error: (401) Unauthorized."
Hi,
DeleteI think you're missing an API permission:
Microsoft Graph:
Mail.Send
This should be of type "Application" and you must click on the "Grant admin consent.." again.
Hi June Castillote
ReplyDeleteSeem like the update that was sent to mail does not updated the latest updated from Microsoft site.
Column [Latest Message] showing previous update but at Service Health showing latest update.
Kindly advise.
Hi June,
ReplyDeleteNo matter where I change the exclusion to "1", it is still sending e-mails for the parts I excluded.
Any idea what is causing this?
Did you edit the list using Excel? If so, that actually messes it up. If not, send me your exclusion file so I can test with it on my end. Thanks.
DeleteIt was indeed cause it was opened in Excel, I edited it in Notepad++ and after that it worked.
DeleteThanks!
I'm glad it worked for you. I hope you find this useful. Thanks.
Delete